In this article, we are going to cover multiple ways you can preserve apples. I know from personal experience having two apple trees in my garden having a big glut can mean eating a lot of apples. This is where preserving comes in.
If you’re fortunate enough to have an apple tree in your backyard or stumble upon a lot of apples at a good price at the local farmers market, you may find yourself faced with an overwhelming amount of fruit. While enjoying fresh apples is great, dealing with a surplus can be a challenge.
That’s where the art of preservation comes in. In this article, we will explore a variety of methods to help you make the most of your apple harvest or bulk purchase. From canning and freezing to fermenting and dehydrating, we’ll cover all the ways you can preserve apples and ensure their flavours and nutrients are enjoyed throughout the year. So, let’s dive into the world of apple preservation and discover how to make the most of this abundant fruit.
Table of Contents
Preserving Apples
In the article, we will cover the following methods of preserving apples:
- Canning
- Freezing
- Dehydrating
- Apple Butter
- Making Applesauce
- Apple Jelly Or Jam
- Apple Chutney
By exploring these various preservation methods, you can ensure that no apple goes to waste and enjoy the taste of this versatile fruit throughout the year.
Best Method Of Storing Apples
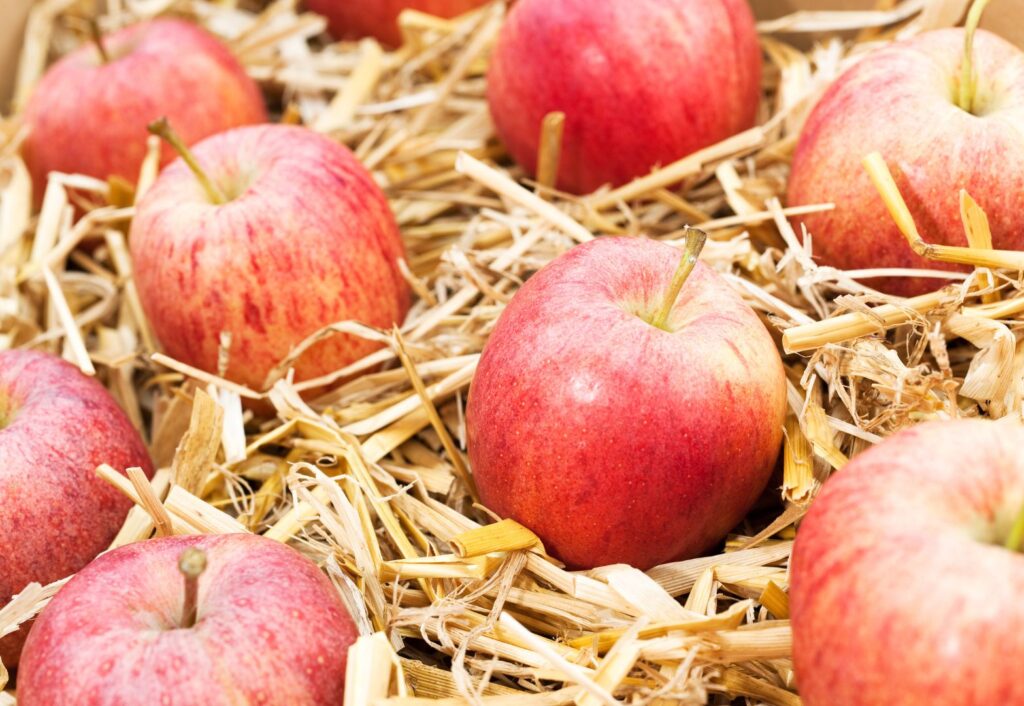
If you have an apple tree and are wondering about the best way to store the apples, there are a few factors to consider. First, it’s important to note that windfall apples, which are apples that have fallen from the tree, may not store as well as those that are picked directly from the tree. Windfall apples are often more prone to bruising and may have already started to deteriorate, so it’s best to use them sooner rather than later.
For apples that are picked from the tree, here are some tips for storing them:
- Harvest at the right time: Apples should be harvested when they are fully ripe but still firm. Avoid picking apples that are overripe or have any signs of damage or disease.
- Sort and inspect: Before storing the apples, sort through them and remove any apples that have bruises, cuts, or signs of rot. These apples should be used immediately or discarded to prevent them from spoiling the others.
- Store in a cool, dark place: Apples should be stored in a cool location with a temperature range of 30-35 degrees Fahrenheit. A root cellar, basement, or garage can be suitable storage areas. Make sure the storage area is dark, as exposure to light can cause the apples to ripen and spoil faster.
- Provide good air circulation: Apples need proper air circulation to prevent moisture buildup, which can lead to rot. Avoid storing apples in plastic bags or airtight containers. Instead, place them in a well-ventilated container, such as a wooden crate or a mesh bag, to allow for air circulation.
- Separate apples: To prevent the spread of rot, it’s important to keep the apples separate from each other. You can achieve this by wrapping each apple individually in newspaper or tissue paper. This will help prevent direct contact between the apples and minimize the risk of spoilage.
- Check regularly: Regularly inspect the stored apples for any signs of spoilage. Remove any apples that show signs of rot or decay to prevent them from affecting the others.
Remember that different apple varieties have different storage capabilities, so it’s a good idea to research the specific variety of apples you have and its recommended storage conditions. By following these guidelines, you can maximize the storage life of your homegrown apples and enjoy them for an extended period.
Canning Apples
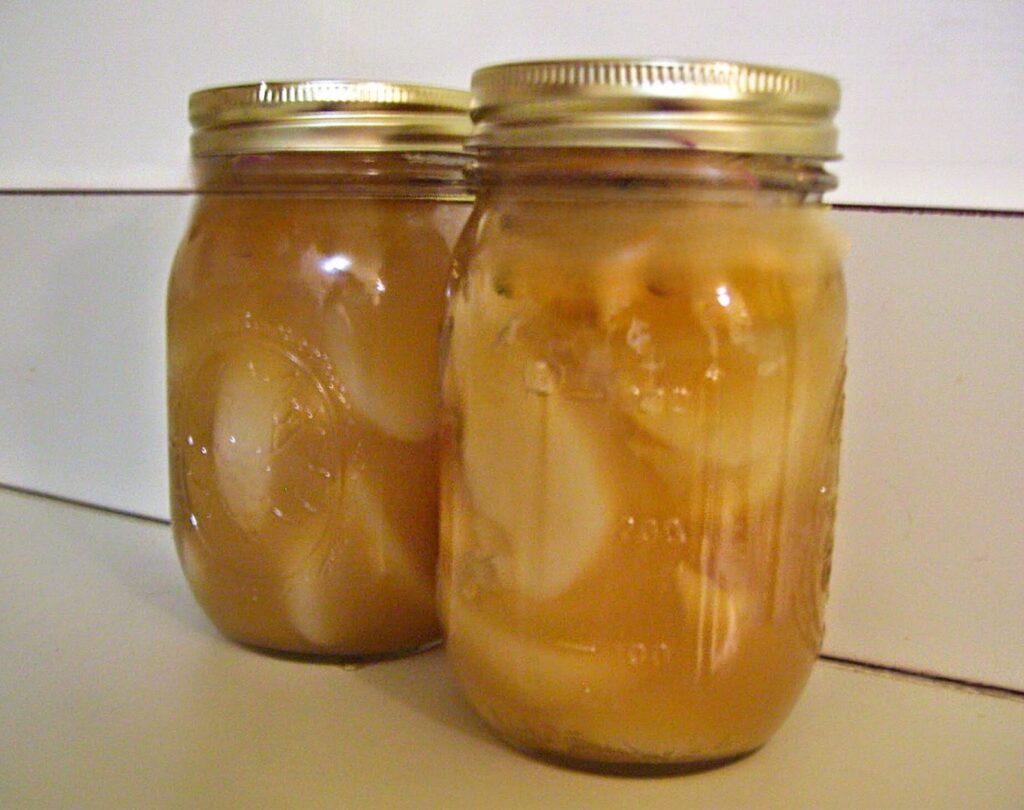
Canning apples in light syrup or juice is a USDA-approved method that allows you to preserve the natural sweetness and flavour of the fruit, creating a versatile ingredient for various recipes or a snack on its own perhaps with some ice cream.
Ingredients:
- 5kg Apples (firm and crisp varieties)
- Water
- Sugar or Apple Juice
- 4 tbsp Lemon juice
Equipment:
- Canning jars (pint or quart size)
- Canning lids and bands
- Boiling water canner
- Jar lifter
- Canning funnel
- Bubble remover/headspace tool
- Large pot
- Cutting board
- Knife
- Measuring cups and spoons
Instructions:
Prepare your canning equipment: Wash jars, lids, and bands in hot soapy water. Rinse well and keep them hot until ready to use. Fill the canner with water and bring it to a simmer.
Wash and prepare the apples: Wash the apples thoroughly under running water. Peel, core, and slice the apples into desired sizes (e.g., slices, chunks, or rings). To prevent browning, you can place the apple slices in a solution of water and lemon juice (1 tablespoon of lemon juice per 1 litre of water).
Prepare a light syrup or juice: you can prepare a light syrup or use juice to pack the apples.
For a light syrup, Mix together 250ml / 1 cup granulated sugar with 1 litre / 4 cups of water in a heavy-based pan. Place on the heat, stirring until the sugar is completely dissolved and bring to a gentle simmer.
This will make 1.125 litres / 41/2 cups of light syrup which is enough for around 8 x 500ml / 1-pint jars packed with apples. For juice, use 100% apple juice. Heat the syrup or juice until it is hot but not boiling.
Simmer the apple slices: Add the prepared apple slices to the syrup or juice and simmer for 5 minutes. This will help remove oxygen and prevent the apples from floating in the jars.
Pack the jars: Fill the hot jars with the prepared apple slices, leaving 1/2-inch headspace. If using syrup or juice, pour it over the apples, maintaining the 1/2-inch headspace. Remove any air bubbles by running a bubble remover or headspace tool along the inside of the jar. Wipe the jar rims with a clean, damp cloth.
Apply lids and bands: Place the lids on the jars and screw the bands on until fingertip tight. Do not over tighten.
Process the jars: Using a jar lifter, carefully place the filled jars into the canner, ensuring they are fully submerged in water. Bring the water to a rolling boil and process the jars according to the following guidelines:
- Pints: Process for 20 minutes (at altitudes up to 1,000 feet)
- Quarts: Process for 25 minutes (at altitudes up to 1,000 feet)
Remove and cool the jars: After the processing time is complete, turn off the heat and carefully remove the jars from the canner using a jar lifter. Place them on a towel-lined countertop or cooling rack, leaving space between the jars. Let the jars cool undisturbed for 12 to 24 hours.
Check the seals and store: After the jars have cooled, check the seals by pressing down on the centre of each lid. If the lid does not flex or pop, the jar is sealed. Remove the bands, wipe the jars clean, label them, and store them in a cool, dark place for up to a year.
Freezing Apples
Freezing apples is an ideal preservation method for apples that you plan to use in cooked dishes or recipes, as they lose some of their texture. The great thing is you know you have apples prepped and ready to be used straight away after thawing.
You can freeze any variety of apples whether it’s an eating apple or a cooking apple the method is the same in both cases
- To freeze apples, start by washing and peeling them, then core and slice them into desired sizes.
- Add the apple slices in a solution of 1 litre of water to 1 tbsp lemon juice to prevent browning.
- Arrange the slices in a single layer on a baking sheet lined with parchment paper and freeze until firm. This will prevent the apples from sticking together in a big mass.
- Transfer the frozen apple slices to airtight freezer bags or containers, removing any excess air, and label them with the date. Store in the freezer for up to 12 months.
Dehydrating Apples
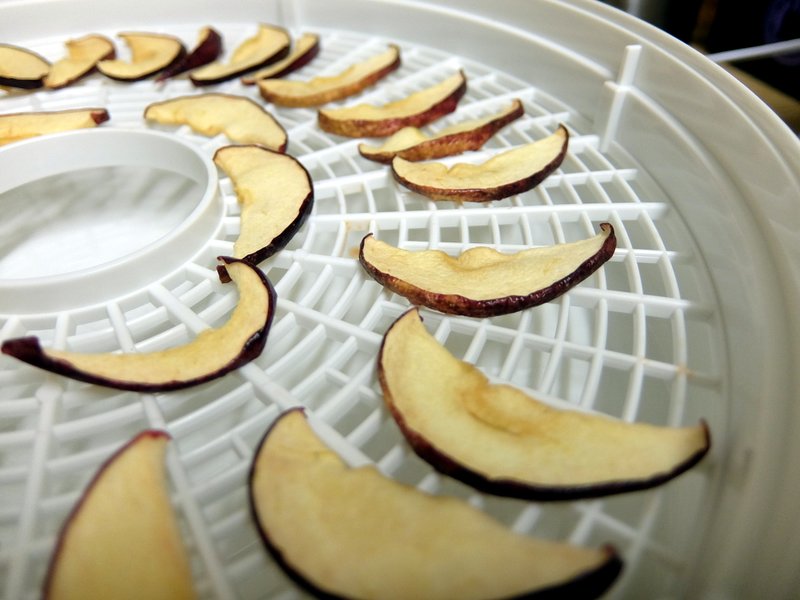
I have written about dehydrating apples before and it is really popular with my kids because they become even sweeter and are like little treats.
Dehydrating apples is a simple way to preserve their flavours and create a healthy snack. By slicing the apples and treating them with acidulated water to prevent browning, you can ensure even drying.
Using a food dehydrator offers convenience, efficiency, and consistent results but if you don’t have a dehydrator you can use a regular domestic oven. Drying apples in the oven requires a bit more attention and time. Whether you choose a dehydrator or oven method, the end result will be crispy, concentrated apple slices that can be enjoyed as a snack or used in various recipes.
For the full guide on dehydrating apples, including detailed instructions and tips, click here.
Making Apple Butter To Preserve Apples

Making apple butter is a wonderful way to preserve apples and enjoy them throughout the year. This fairly traditional method of cooking down apples into a thick, smooth spread not only intensifies their natural sweetness but allows you to flavour the apples with spices like cinnamon, cloves, and nutmeg. You can experiment with your own flavourings
By slowly simmering the apples over low heat, the moisture evaporates, resulting in a concentrated and spreadable texture. The addition of sugar and lemon juice helps balance the flavours and both these things along with processing the jars help to preserve them.
Once the apple butter reaches the desired consistency, it can be stored in sterilized jars, creating a shelf-stable product that can be enjoyed for months to come.
Whether spread on toast, used as a filling for pastries, or incorporated into various recipes, apple butter is a fantastic way to use up a glut of apples.
Ingredients:
- 2.25 kilograms of apples (preferably a mix of sweet and tart varieties)
- 400 grams of granulated sugar
- 200 grams of brown sugar
- 1 tsp of ground cinnamon
- 1/2 tsp of ground cloves
- 1/2tsp of ground nutmeg
- pinch of salt
- Juice of 1 lemon
Instructions:
1. Wash, peel, and core the apples. Cut them into small chunks or slices.
2. Place the apple chunks/slices in a large pot or slow cooker.
3. Add the granulated sugar, brown sugar, cinnamon, cloves, nutmeg, salt, and lemon juice to the pot.
4. Stir the mixture well to evenly coat the apples with the sugar and spices.
5. Cook the mixture over low heat for about 8-10 hours in a slow cooker or 2-3 hours on the stovetop, stirring occasionally. The apples should become soft and mushy.
6. Once the apples are cooked down and have a thick consistency, use an immersion blender or a regular blender to puree the mixture until smooth. Be careful when blending hot liquids.
7. Return the pureed mixture to the pot and continue cooking over low heat for another 1-2 hours, stirring occasionally, until the apple butter thickens further.
8. Taste the apple butter and adjust the sweetness or spices according to your preference.
9. Once the desired consistency is reached, remove the pot from the heat and let the apple butter cool.
10. Transfer the apple butter into sterilized jars, leaving about 5 – 6 millimetres of headspace at the top. Seal the jars tightly.
11. Process the jars in a boiling water bath for about 10 minutes to ensure proper preservation.
12. Remove the jars from the water bath and let them cool completely before storing them in a cool, dark place.
Note: This recipe yields approximately 1 litre / 1 quart of apple butter. The apple butter can be stored for several months if properly sealed and stored in a cool place.
Canning Applesauce
Preserving apples by making applesauce is a quick and simple way to enjoy the flavours of this fruit throughout the year. Applesauce is a versatile ingredient that can be used in various recipes or enjoyed on its own. By canning applesauce, you can extend its shelf life and have a ready-to-use supply whenever you need it.
Canning applesauce not only allows you to capture the natural sweetness and tanginess of apples but also ensures its long-term preservation. The addition of lemon juice provides the necessary acidity to make the applesauce safe for canning, while the optional sugar allows you to customize the sweetness according to your preference.
Preserving applesauce through canning is a straightforward process that involves cooking the apples, mashing them, and then sealing them in sterilized jars. The water bath canning method creates a vacuum seal, preventing spoilage and maintaining the quality of the applesauce for an extended period.
Whether you have an abundance of apples from your own orchard or have found a great deal at the local market, making and canning applesauce is an excellent way to get the most out of a glut of apples
In the following recipe, we will guide you through the steps of safely canning applesauce.
Ingredients:
- 5kg of apples (mix of sweet and tart varieties)
- 120ml (1/2 cup) of water
- 4 tbsp of lemon juice (freshly squeezed)
- Sugar (optional, to taste)
Equipment:
- Hot water bath canner or Large pot with rack
- Canning jars with lids and bands
- Canning funnel
- Jar lifter
Instructions:
Prepare the Water Bath and Jars: Fill a water bath canner or large stockpot with enough water to cover the jars by 1-2 inches. Place the canning jars, lids, and bands into the water. Bring the water to a simmer, but do not boil. Keep the jars in the simmering water until ready to use.
Prepare the Apples: Wash, peel, and core the apples. Cut them into chunks or slices, removing any bruised or damaged parts.
Cook the Apples: In a large pot, combine the apple chunks, water, and lemon juice. Simmer until the apples are soft and easily mashed, stirring occasionally. This usually takes about 20-30 minutes.
Mash the Apples: Mash the cooked apples to your desired consistency using a potato masher or immersion blender. For a smoother texture, use a blender or food processor.
Add Sugar (Optional): Taste the applesauce and add sugar if desired. Start with a small amount and gradually increase to your preferred level of sweetness.
Fill the Jars: Using a canning funnel, ladle the hot applesauce into the sterilized jars, leaving 1/2 inch of headspace. Remove air bubbles by tapping the jars or using a non-metallic utensil.
Seal the Jars: Wipe the jar rims with a clean, damp cloth. Place the lids on the jars and screw on the bands until fingertip tight.
Process the Jars: Carefully place the filled jars into the prepared water bath canner or stockpot. Ensure the jars are fully submerged with 1-2 inches of water above them. Bring the water to a gentle boil. Process the jars in the boiling water bath for 15 minutes (adjust for altitude if needed). Start the timer once the water reaches a rolling boil.
Remove and Cool: Use a jar lifter to remove the jars from the water bath and place them on a kitchen towel or cooling rack. Allow the jars to cool undisturbed for 12-24 hours.
Check the Seals: After cooling, check the seals by pressing down on the centre of each lid. Properly sealed lids should not flex or make a popping sound. Refrigerate any unsealed jars and consume them within a few weeks.
Store and Enjoy: Label the sealed jars with the date and store them in a cool, dark place. Properly sealed jars can be stored for up to a year. Once opened, refrigerate the applesauce and consume it within a week or two.
Remember to follow proper safety guidelines and use tested recipes when canning to ensure food preservation.
Preserving Apples As An Apple Jelly
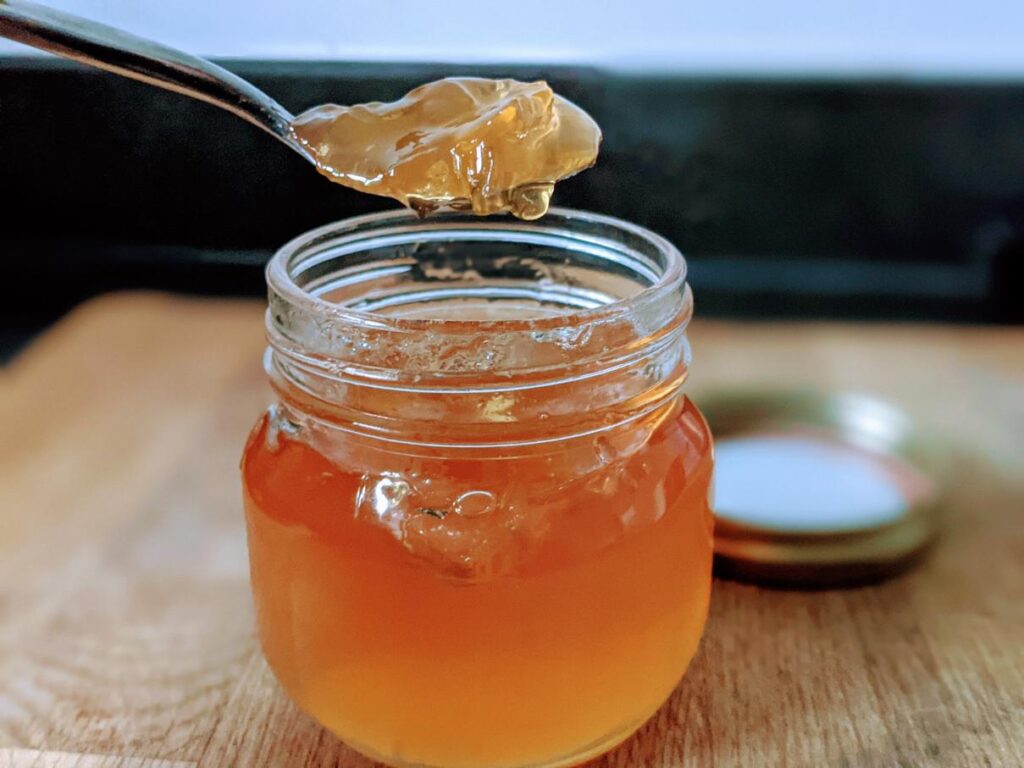
Making your own apple jelly or jam is a fantastic way to preserve apples and I have written about it here on Preserve and Pickle before, I also have a recipe for crab apple jelly which is a great way to preserve these more woody fruits. With a few simple ingredients and some basic kitchen equipment, you can create a sweet and tangy spread that captures the essence of fresh apples.
Whether you prefer a smooth jelly or a chunky jam, there are plenty of recipes and techniques to explore.
To get started, you’ll need fresh apples, sugar, and lemon juice. The type of apple you choose will greatly impact the flavour of your jelly or jam, so consider using a mix of sweet and tart varieties for a well-balanced taste.
After washing and chopping the apples, you’ll simmer them in water until they become soft and release their juices. Then, strain the liquid through a jelly bag or cheesecloth to extract the apple juice.
Once you have the apple juice, it’s time to add the sugar and lemon juice which will help activate the pectin to get a good set on your jelly. The sugar adds sweetness, while the lemon juice provides a touch of acidity to balance the flavours.
Pectin is a natural thickening agent that helps the jelly or jam set properly. Bring the mixture to a boil, stirring constantly, until it reaches the desired consistency. You can test the readiness of the jelly or jam by using the spoon test or a jam thermometer.
If you’re eager to dive deeper into the process of making apple jelly or jam, we have a comprehensive guide that walks you through each step in detail. From selecting the right apples to canning and storing the finished product, our guide covers everything you need to know.
Apple Chutney
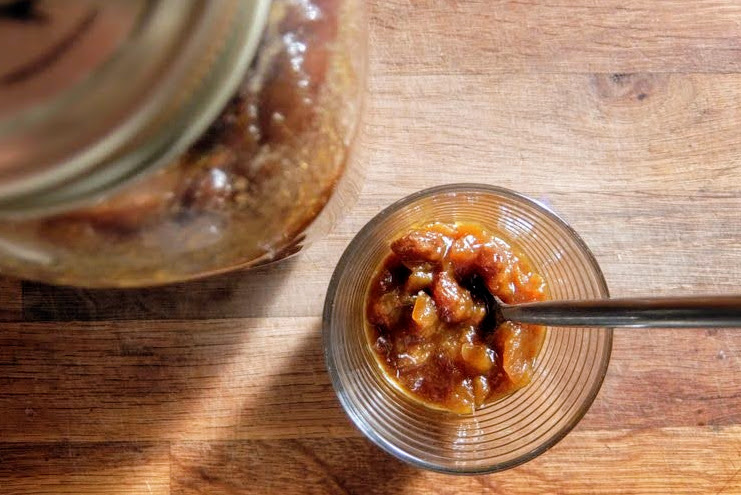
Preserving apples by making chutney is a great way of this versatile fruit all year round if you are tired of jams and sweeter preserves. Apple chutney is a condiment made with a combination of apples, sugar, vinegar, other fruits and various spices. The sugar and vinegar play a crucial role in preserving the chutney and extending its shelf life.
When making apple chutney, sugar acts as a natural preservative. It helps to create an environment that inhibits the growth of bacteria and other microorganisms. The sugar also helps to draw out the moisture from the apples, which further aids in preservation. Additionally, sugar adds sweetness to balance the tartness of the apples and enhances the overall flavour profile of the chutney.
Vinegar, on the other hand, provides acidity to the chutney. This acidity not only adds a tangy taste but also helps to prevent the growth of bacteria and moulds. The high acidity level in vinegar creates an unfavourable environment for microorganisms to thrive, thus preserving the chutney for a longer period. Apple cider vinegar is often used in apple chutney recipes as it complements the flavours of the apples.
If you’re interested in making your own apple chutney, you can find a comprehensive guide with step-by-step instructions and additional tips by following this link. It will provide you with all the information you need to create a delicious and properly preserved apple chutney that you can enjoy throughout the year.
