
I’m sure everyone is familiar with fermented pickles like this. A familiar sight in every burger restaurant throughout the world, pickled gherkins or cucumbers are one of the most recognisable preserved foods anywhere. The process of making fermented pickles is simple to do at the same time as making some of the most complex flavours using the most basic of ingredients.
Table of Contents
Sour Fermented Pickles
Pickles or Gherkins as they are referred to in some countries at their simplest are cucumbers fermented in a brine. It may seem like a mystifying process because, to begin with, you simply have a salt solution and cucumbers.
Over the period of a couple of weeks of storage, however, fermentation occurs and completely transforms the cucumbers, it changes the acidity, the flavour and the texture of the pickles during the process. All of this comes about through a friendly bacteria called Lactobacillus.

Vinegar Pickles Vs. Fermented Pickles
What we are doing when making pickles is preserving them in an acidic solution. Acids prevent bacteria or spoilage organisms from growing, you can read more about this here.
This means that pickles can be made in different ways, to preserve the cucumbers or most vegetables all that is required is a pH between 2.1 and 4.5. If the pH is above 4.5 the pickles will still spoil, below 2.1 and it is far too acidic.
Pickles Made In Vinegar
This level of pH can be achieved by soaking the vegetables in vinegar. Vinegar has a pH of around 2.4%. This makes it very easy to take your vegetables prepare them and then store them in jars and cover with vinegar. This is how many companies make pickles and other pickled food as it easy and doesn’t require live cultures. Fermented pickles, on the other hand, are made in a slightly different way.
Fermented Pickles
Fermented pickles on the other hand still use the same principle of having an acidic pH but the acid is introduced in a slightly different way. Rather than covering the cucumbers or other vegetables in an acidic solution like vinegar, they are covered in a salty brine. This inhibits bacterial growth and spoilage except for a certain acid-producing bacteria called lactobacillus.
Lactobacillus is present on all vegetable and they can thrive in a salty environment where other bacteria cannot. These friendly bacteria feed on sugars in the cucumbers and produce lactic acid as a byproduct.
This process is called fermentation and reduces the pH in the brine over the course of 2 – 3 weeks. After this time the pH is low enough, below 4.5, the cucumbers will be stable and will not spoil sitting in a jar for many months or even up to a year if stored in the fridge.
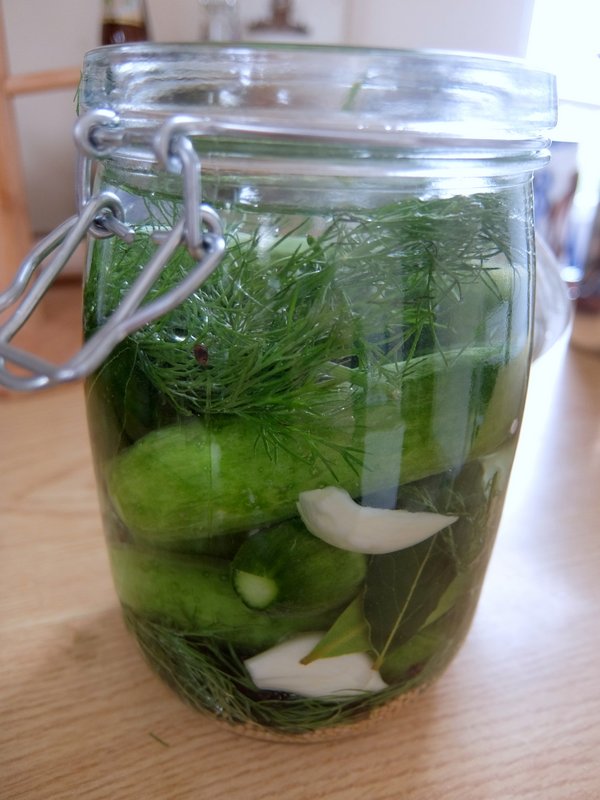
Fermentation Jars

![]()
As you already know all pickles are stored in jars, this is part of what keeps them preserved. Fermenting pickles, however, is a process that generates carbon dioxide. As the bacteria produce acid they also produce carbon dioxide. This means we cannot seal the jars right away as the gas needs to escape.
In this recipe I have used regular screw top jars but if you are interested in fermentation jars check out this article.
Cucumbers and Brine
It is this process of fermentation that is so simple, at its most basic all we need is cucumbers salt and water to make the pickles but we can also add flavour in the form of herbs, spices and other ingredients.
The Brine
The brine is simply a combination of salt and water. The strength of the brine is what is important. The strength of the brine is what stops spoilage organisms from growing whilst still allowing acid producing bacteria to thrive so this is important to get right.
To make a brine of a particular percent strength is easy if you measure the water and the salt by weight. As an example, 1 litre of water is equal to 1kg. To make a 5% brine we need to add 50 grams of salt.
The easiest way to work out how much salt you need to water is to use this brine calculator. You can just input the % brine you want and the amount you want to make. You can decide how much brine to make according to the size of your jars.
The Cucumbers

The cucumbers you use will depend on what is available near you. You will want to try and find small cucumbers if you want to preserve them whole like in this recipe.
There are several varieties of cucumbers such as Kirby cucumbers that are solely used for pickling because they have a firmer texture and stay crunchy in a brine. These may not be available where you are unless you grow them yourself.
I have found baby cucumbers to ferment just fine and have not had any problem with them losing their firm texture. These are more likely to be available year round and are great for pickling.
You could, of course, ferment cucumbers that are sliced or cut into spears and this should work fine, I would recommend removing the seeds if you do as they will become mushy as they are primarily water.
Fermented Pickles Recipe – Makes A Litre/Quart Sized Jar
This recipe is to make dill pickles and uses a 4% brine that gives a great sourness and maintains the firm and crunchy flesh of the cucumbers.
- 8 – 10 Pickling Cucumber / Baby Cucumbers
- 1 Litre / 1 Quart Chlorine Free Water
- 40 Grams / 1.4 Ounces Salt
- Small Bunch Of Dill
- 1 Bay Leaf
- 1 Tbsp Mustard Seeds
- 2 Cloves Garlic
- 1 Tsp Peppercorns

Fermented Dill Pickle Method
1. To begin, wash the cucumbers thoroughly under cold running water. Prepare them by removing the very tip from the end where there is a little tail (opposite from the stalk end). This helps the cucumbers maintain their texture when pickled.
2. Prepare the brine by mixing the water and the salt together and ensure the salt is fully dissolved.
3. Gently arrange the cucumbers in your jar and pack them in close together. They will have a tendency to float in the brine so packing them in helps prevent this, we want them submerged in the brine the whole time. Sprinkle in the mustard seeds and peppercorns.
4. Peel the garlic and gently crush with the side of a knife but do not chop. Add this to the jar and arrange the dill in the jar alongside the cucumber pickles.
5. Pour over the brine so that the ingredients are completely submerged. There is likely to be more brine than necessary. Give the jar a shake and poke down the pickles to ensure there are no air bubbles trapped.
6. Secure the jar with a lid and leave at room temperature, fermentation will begin after a couple of days. Begin to vent the jar twice a day to ensure carbon dioxide is not building up. If you prefer you can just cover the jar with a coffee filter paper as it doesn’t need to be airtight, this will keep bug and dust out.
7. After a week fermentation should have really started. The brine will turn slightly cloudy. You may taste the brine and pickles after a week to see how sour it is. You may allow the fermentation for another week or 2. Once they have soured sufficiently to your taste you can seal the jar and place in the fridge.
The dill pickles will last for months in the fridge. Generally speaking the sourer they are the longer they will last. Make sure you vent the jar a couple of time in the fridge but the cool temperatures will stop the fermentation. Keep the pickles submerged in the brine until they are finished.


Thank you for this informative post! I love fermenting pickles but it has been a long time since I have naturally fermented my own! Can’t wait to do it at home again. I usually use water and salt, but vinegar is easy too! Thanks for sharing!
Thank you Thank you Thank you for posting the required PH levels and salt levels for preventing spoilage. I have been looking everywhere for the PH levels needed. Thanks so very much!
Glad you found the article helpful!